There are two ways of asking donation by using the SatoshiPay WordPress Plugin:
1. By adding a donation button to a blog post (the simpler way)
2. By adding a donation button to the sidebar or footer (the more complicated way)
1. By adding a donation button to a blog post
Log into your WordPress Dashboard. Click "Posts" and select "All Posts" on the menu on the left side of the page. Click on the title of the article where you would like to add a donation button.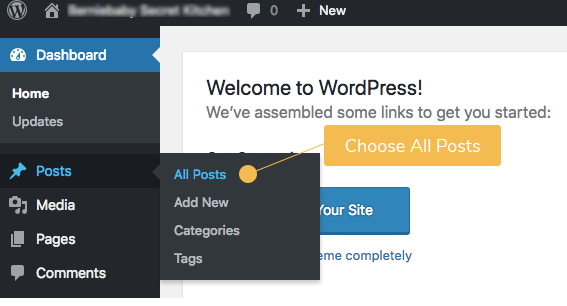
a. On the latest version of WordPress with Gutenberg
After clicking the "+" sign, scroll down and look for "SatoshiPay". Click the little arrow next to "SatoshiPay" to further expand the menu. Select "Donation".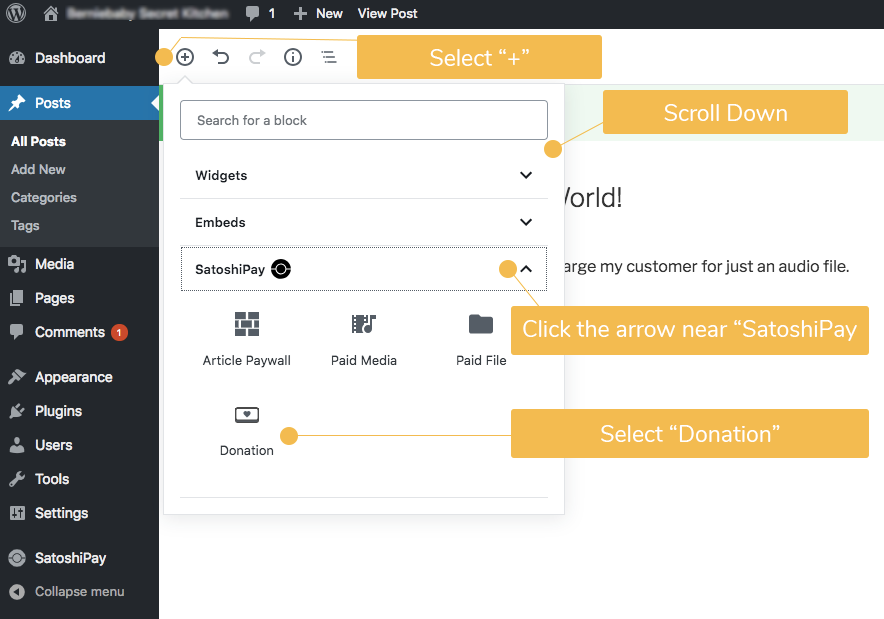
Click "Activate donation button"
Type in the amount of lumens you would like to receive under "Price". Choose a currency to show the value of the lumens you are requesting for in terms of a particular currency. Click the box under "COVER" to choose a cover picture for your donation button (optional). 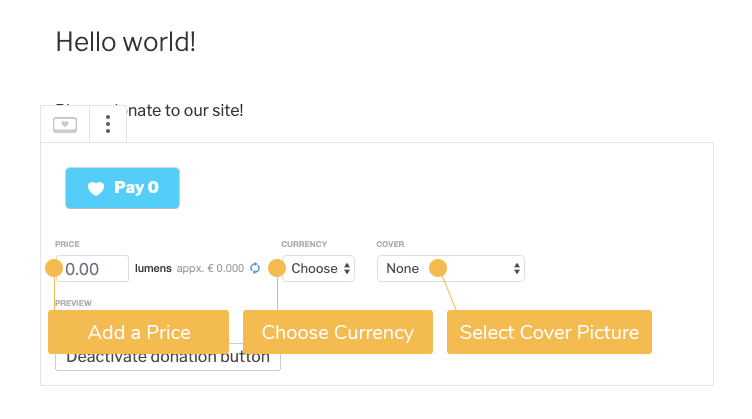
Click "Update" on the top right corner to confirm the change.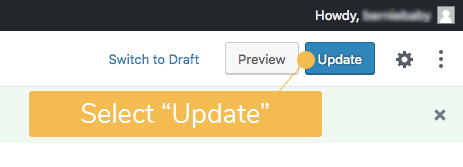
Your customers will now see a donation button in your post. Once they donate by clicking the "DONATE" button, the whole donation button (including the preview picture) will disappear. 
b. On the Older Versions of WordPress
Click on the spot where you will like to add the donation button, and then select "SatoshiPay" on the toolbar and choose "Add Donation Button". 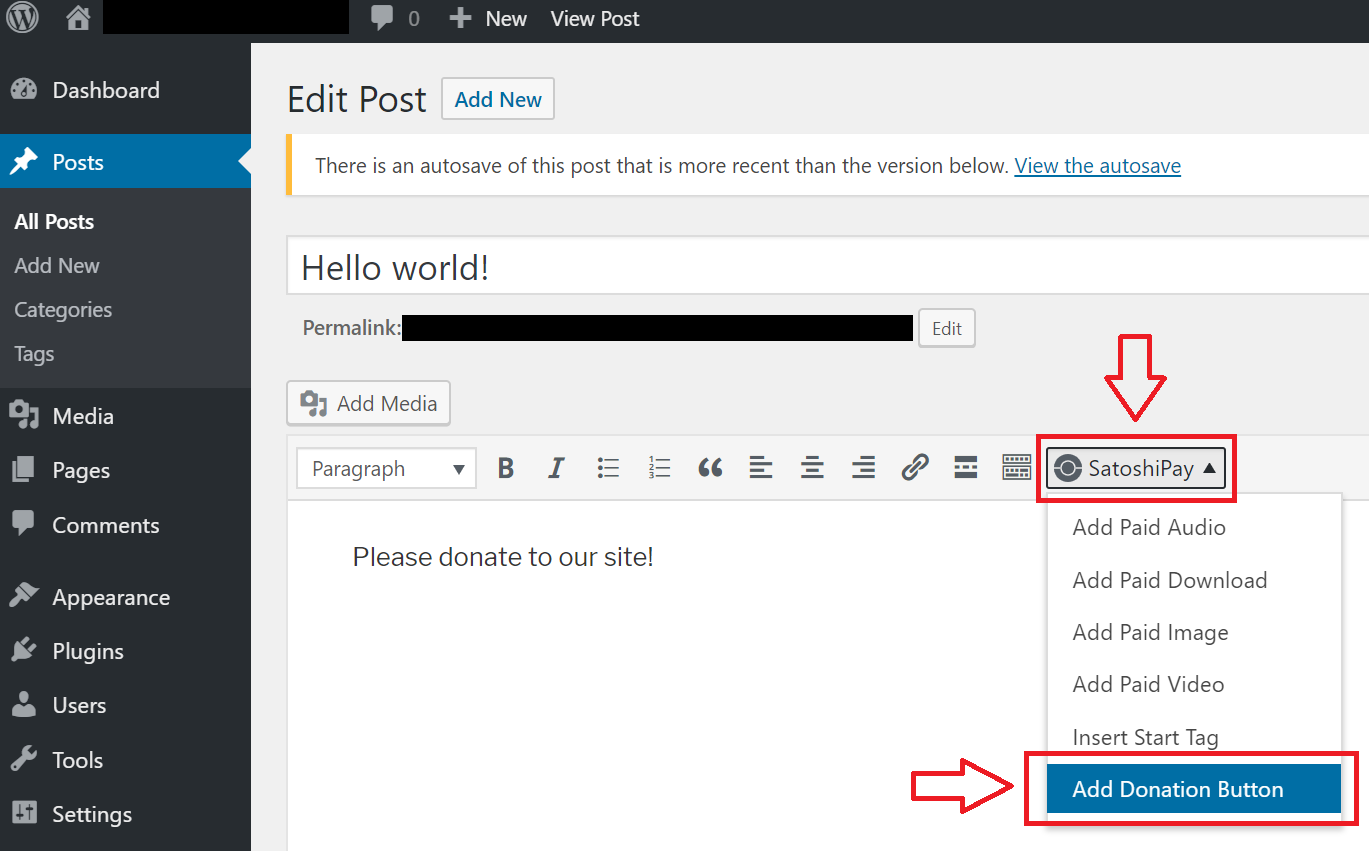
Afterward, add the amount of donation SatoshiPay should collect from each donor in the box next to "Price (lumen)" and add the dimensions of the donation button. Don't forget to add the image of your donation button as "Preview image". Double-check if everything is correct, and then click "OK" to confirm it. 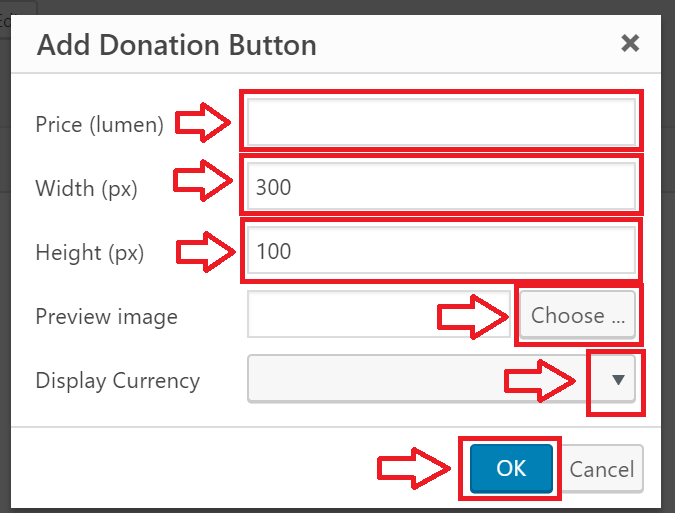
After clicking "OK", don't forget to double-check the SatoshiPay meta box on the right side of the page. Make sure that both the checkbox near "Paid Post" and the box underneath "Price" are empty. Finally, click "Update" or "Publish" in the "Publish" meta box to confirm.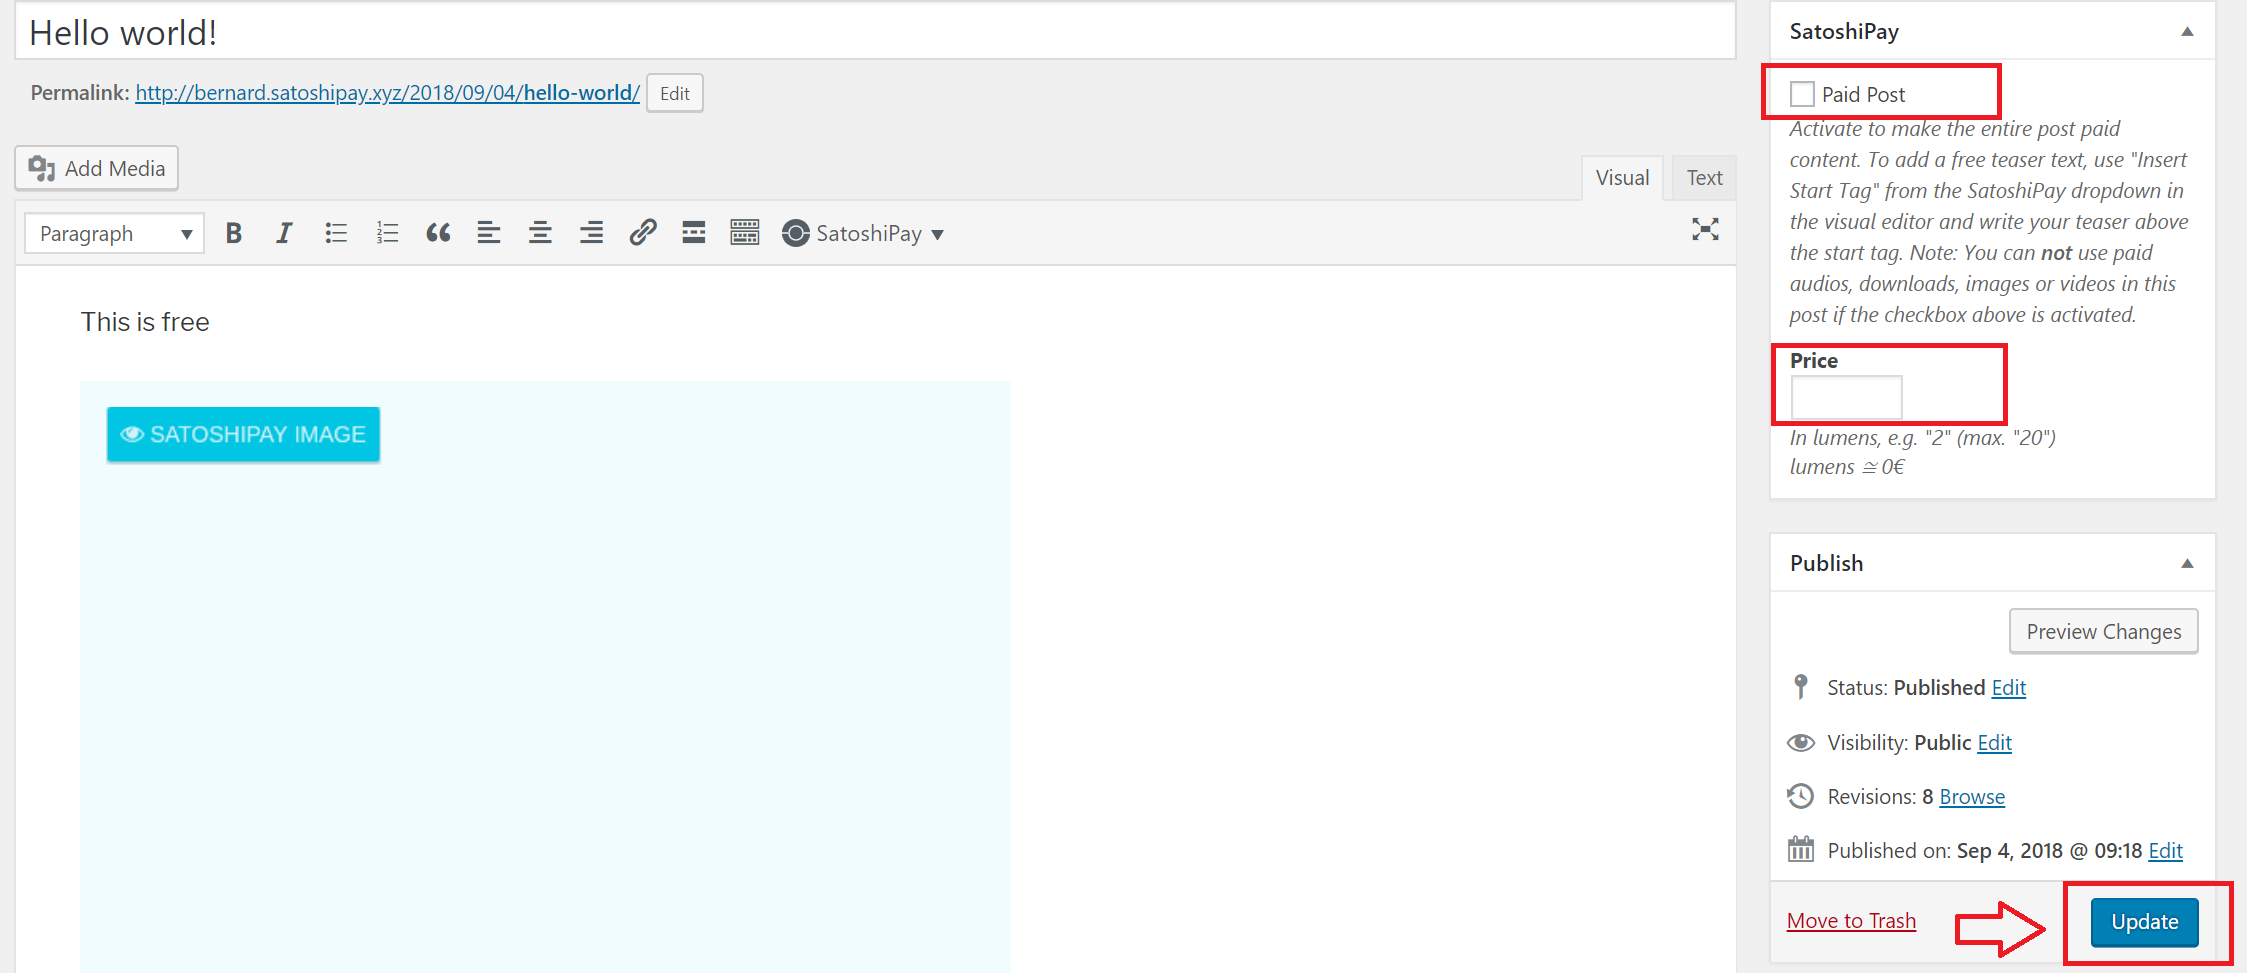
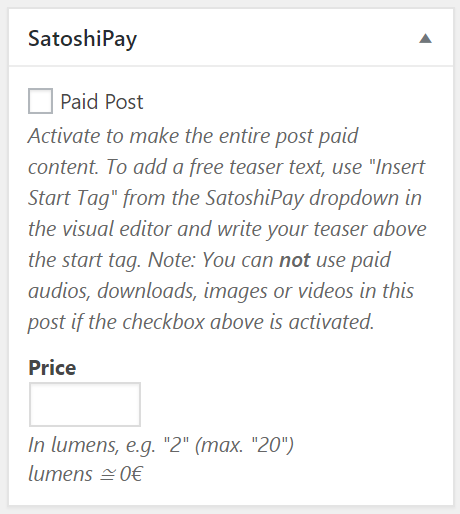
Your customers will now see a donation button in your post. Once they donate by clicking the "DONATE" button, the whole donation button (including the picture) will disappear. 
2. By adding a donation button to the sidebar or footer
Firstly, log into the SatoshiPay Dashboard.
On the "Donate Button" page, you can generate a donation button for your website. Fill in the relevant information and click "Generate Tag". Make sure your URL starts with "https://" or "http://".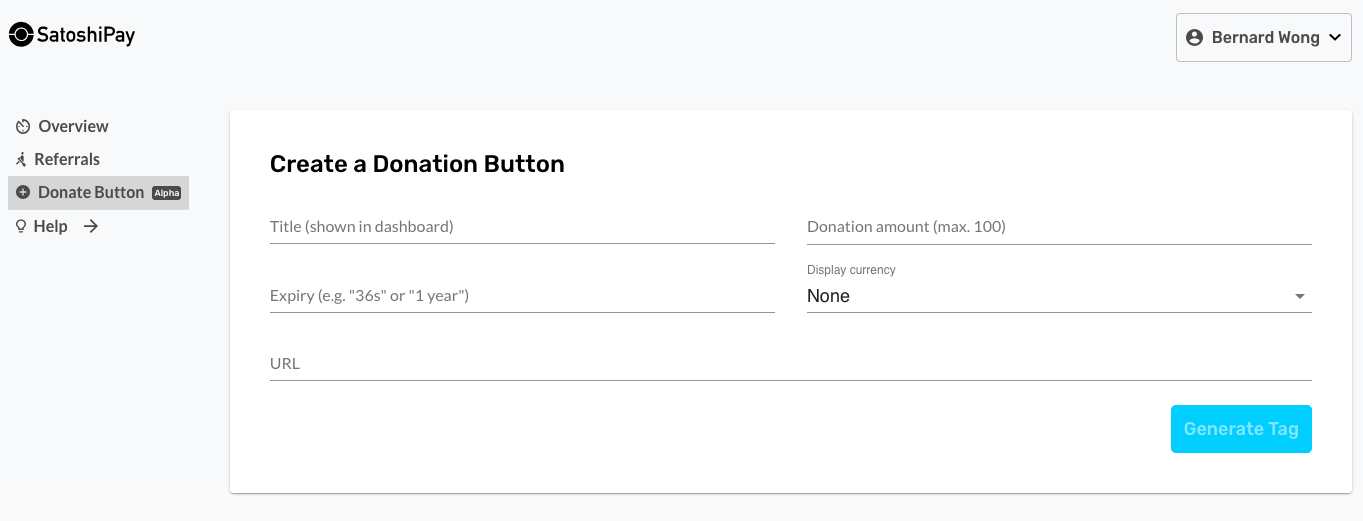
A tag for creating a donation button would be generated. Click the button on the right to copy it. 
Go back to your WordPress Dashboard. On the main menu, hover your mouse over "Appearance" and then click "Widgets"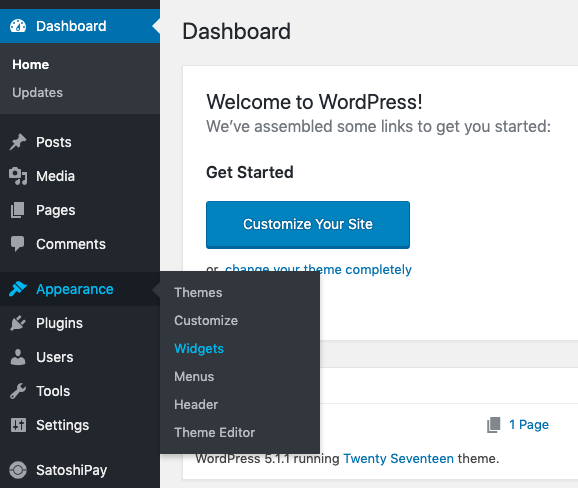
Choose "Custom HTML"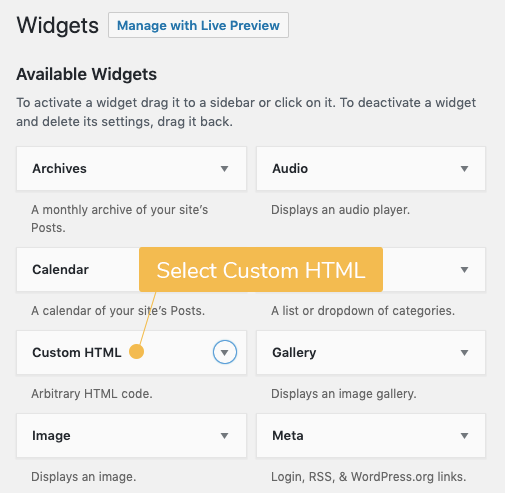
Choose the location where you would like to insert your donation banner ("Blog Sidebar", "Footer 1" or "Footer 2"). And then click "Add Widget". 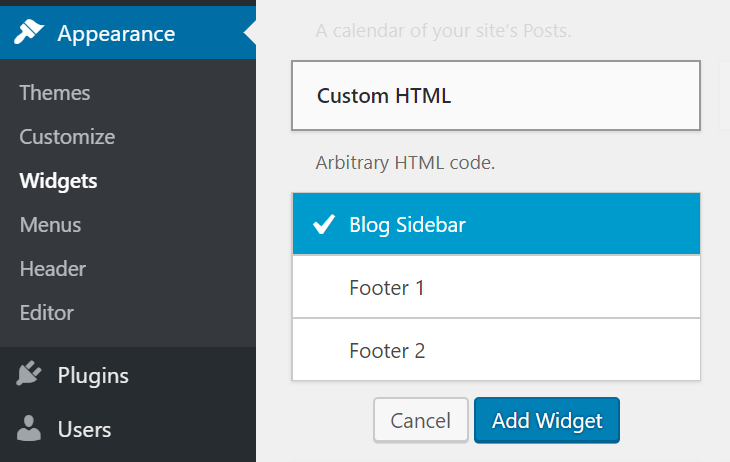

A "Custom HTML" meta box will appear on the page. Paste the code which you have previously copied to the box underneath "Content". And then click save. 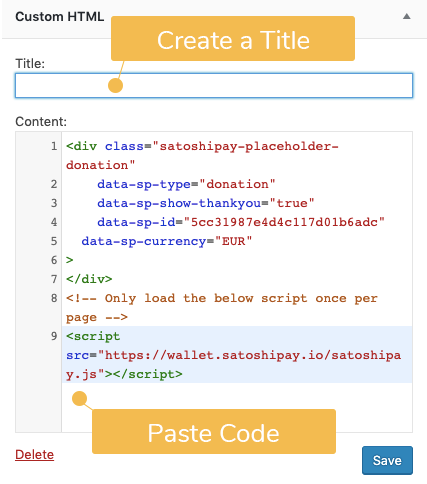
Your donation banner will now appear at the designated location. 

Comments
0 comments
Article is closed for comments.