Please read the following instruction if you would like to charge your customers for an image. If you would like to charge customers for the entire post, please click here.
Instruction:
Log into your WordPress Dashboard. Click "Posts" and select "All Posts" on the menu on the left side of the page. Click on the title of the article where you would like to add a charged image. 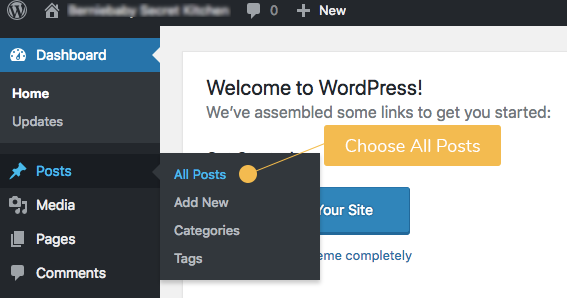
A. On the latest version of WordPress with Gutenberg
To add a video, click the plus sign on the top left corner of the page.
After clicking the "+" sign, scroll down and look for "SatoshiPay". Click the little arrow next to "SatoshiPay" to further expand the menu. Choose "Paid Media".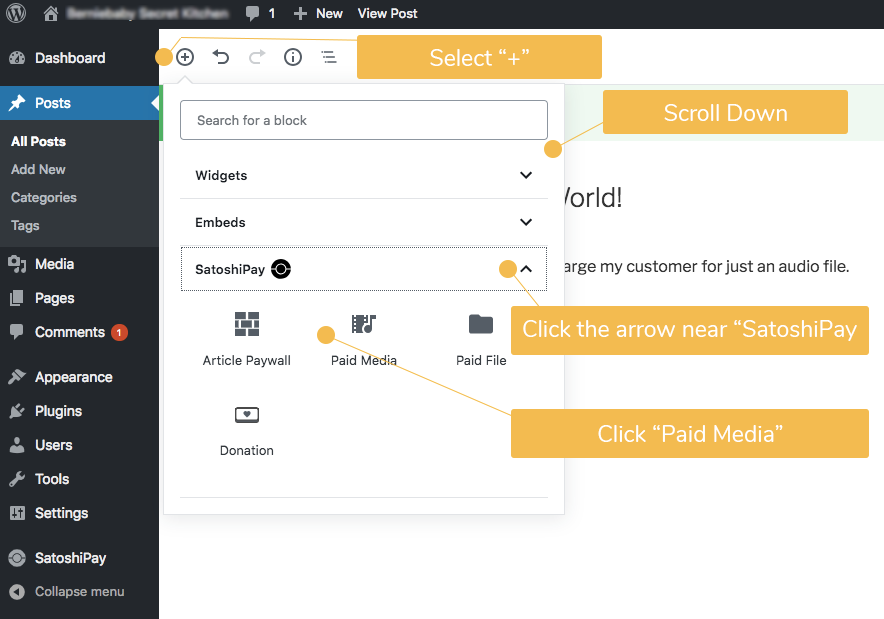
Choose "Upload" to upload a file.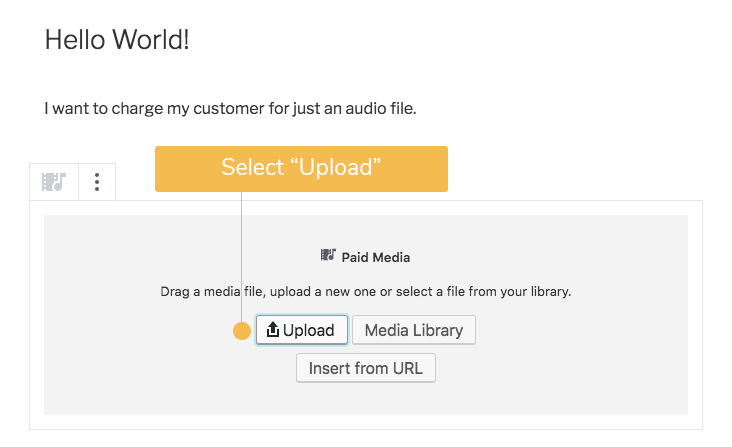
After choosing an image to upload, (1) set a price to the image and (2) choose a cover picture (optional). 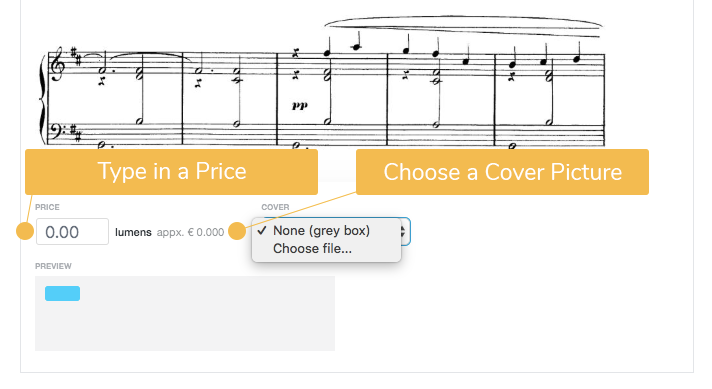
Click "Update" on the top right corner to confirm the change.
Your customers will now only see a preview picture with a price tag before they pay. Once they pay by clicking the "PAY" button, the original picture will then be revealed.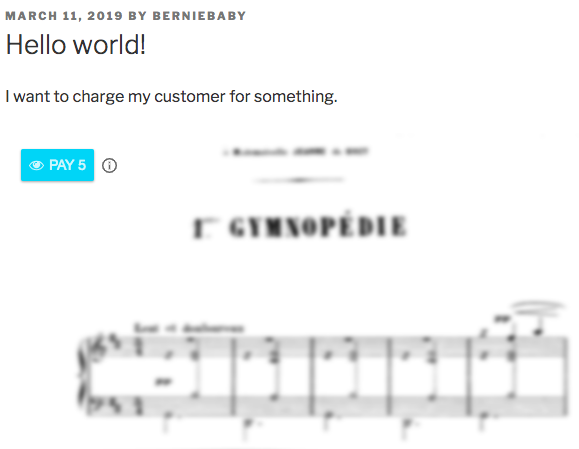
The process is almost the same when you create a new post instead of editing an old post. Simply follow the same procedure described above. However, instead of clicking the "Update" button in the end, simply click the "Publish" button at the same location to confirm it.
B. On older versions of WordPress
On the "Edit Post" page, choose "Add Paid Image" from the SatoshiPay toolbar.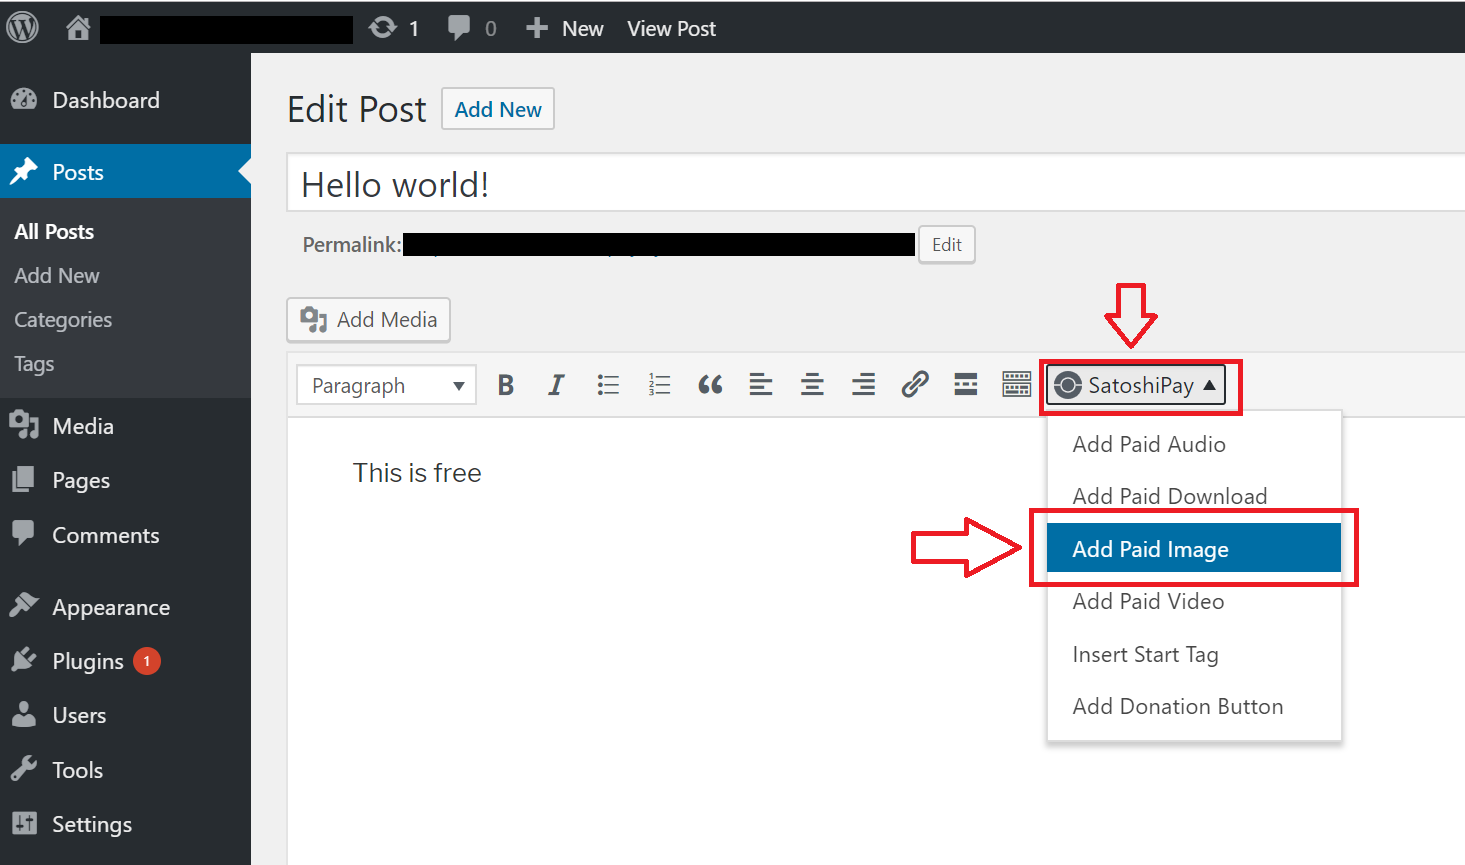
Go to "Upload Files". Click "Select Files" to find the image you would like to upload. Click "Insert" on the bottom right corner of the page to confirm it. 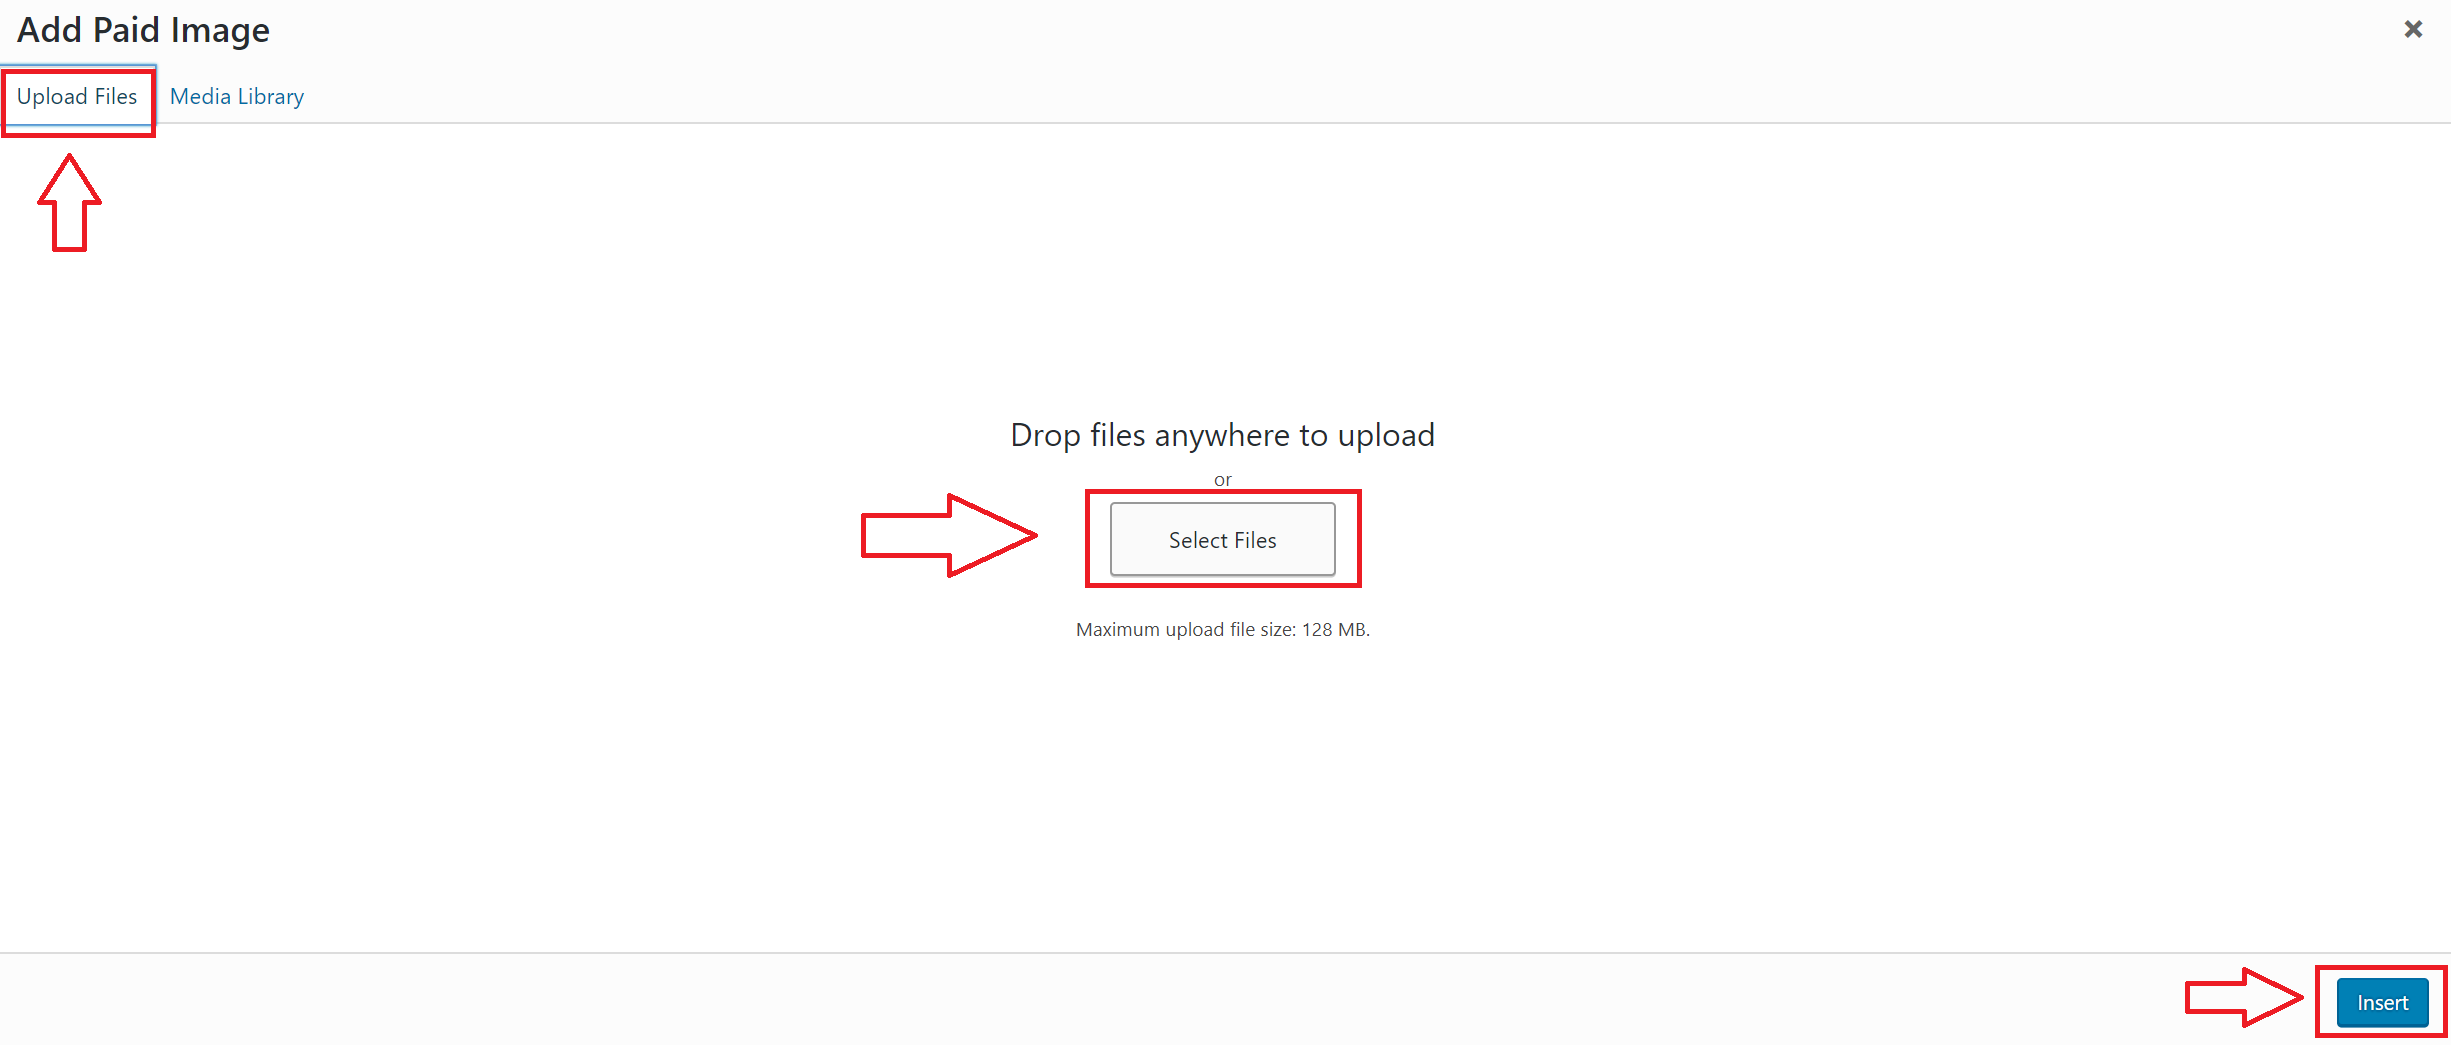
Afterward, add the price and the dimensions of your image. Don't forget to choose a preview image, which would be used to cover the paid image until your customer pays for it. Double-check if everything is correct, and then click "OK" to confirm it. 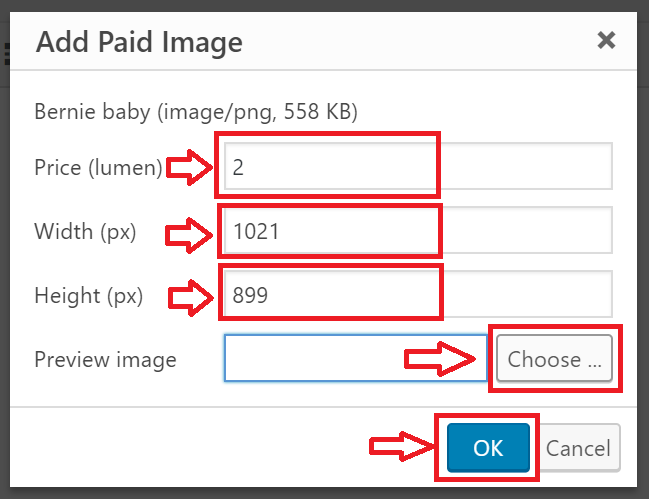
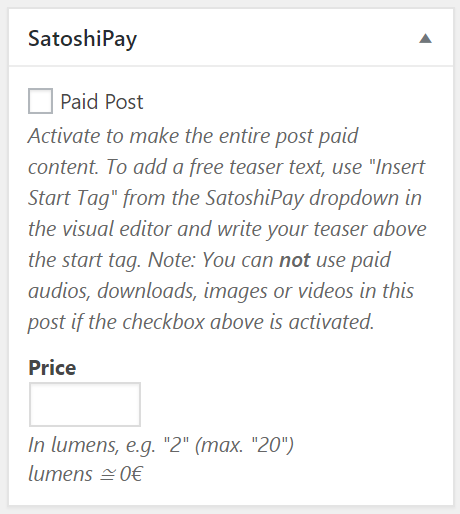
After clicking "OK", don't forget to double-check the SatoshiPay meta box on the right side of the page. Make sure that both the checkbox near "Paid Post" and the box underneath "Price" are empty. Finally, click "Update" in the "Publish" meta box to confirm. DONE!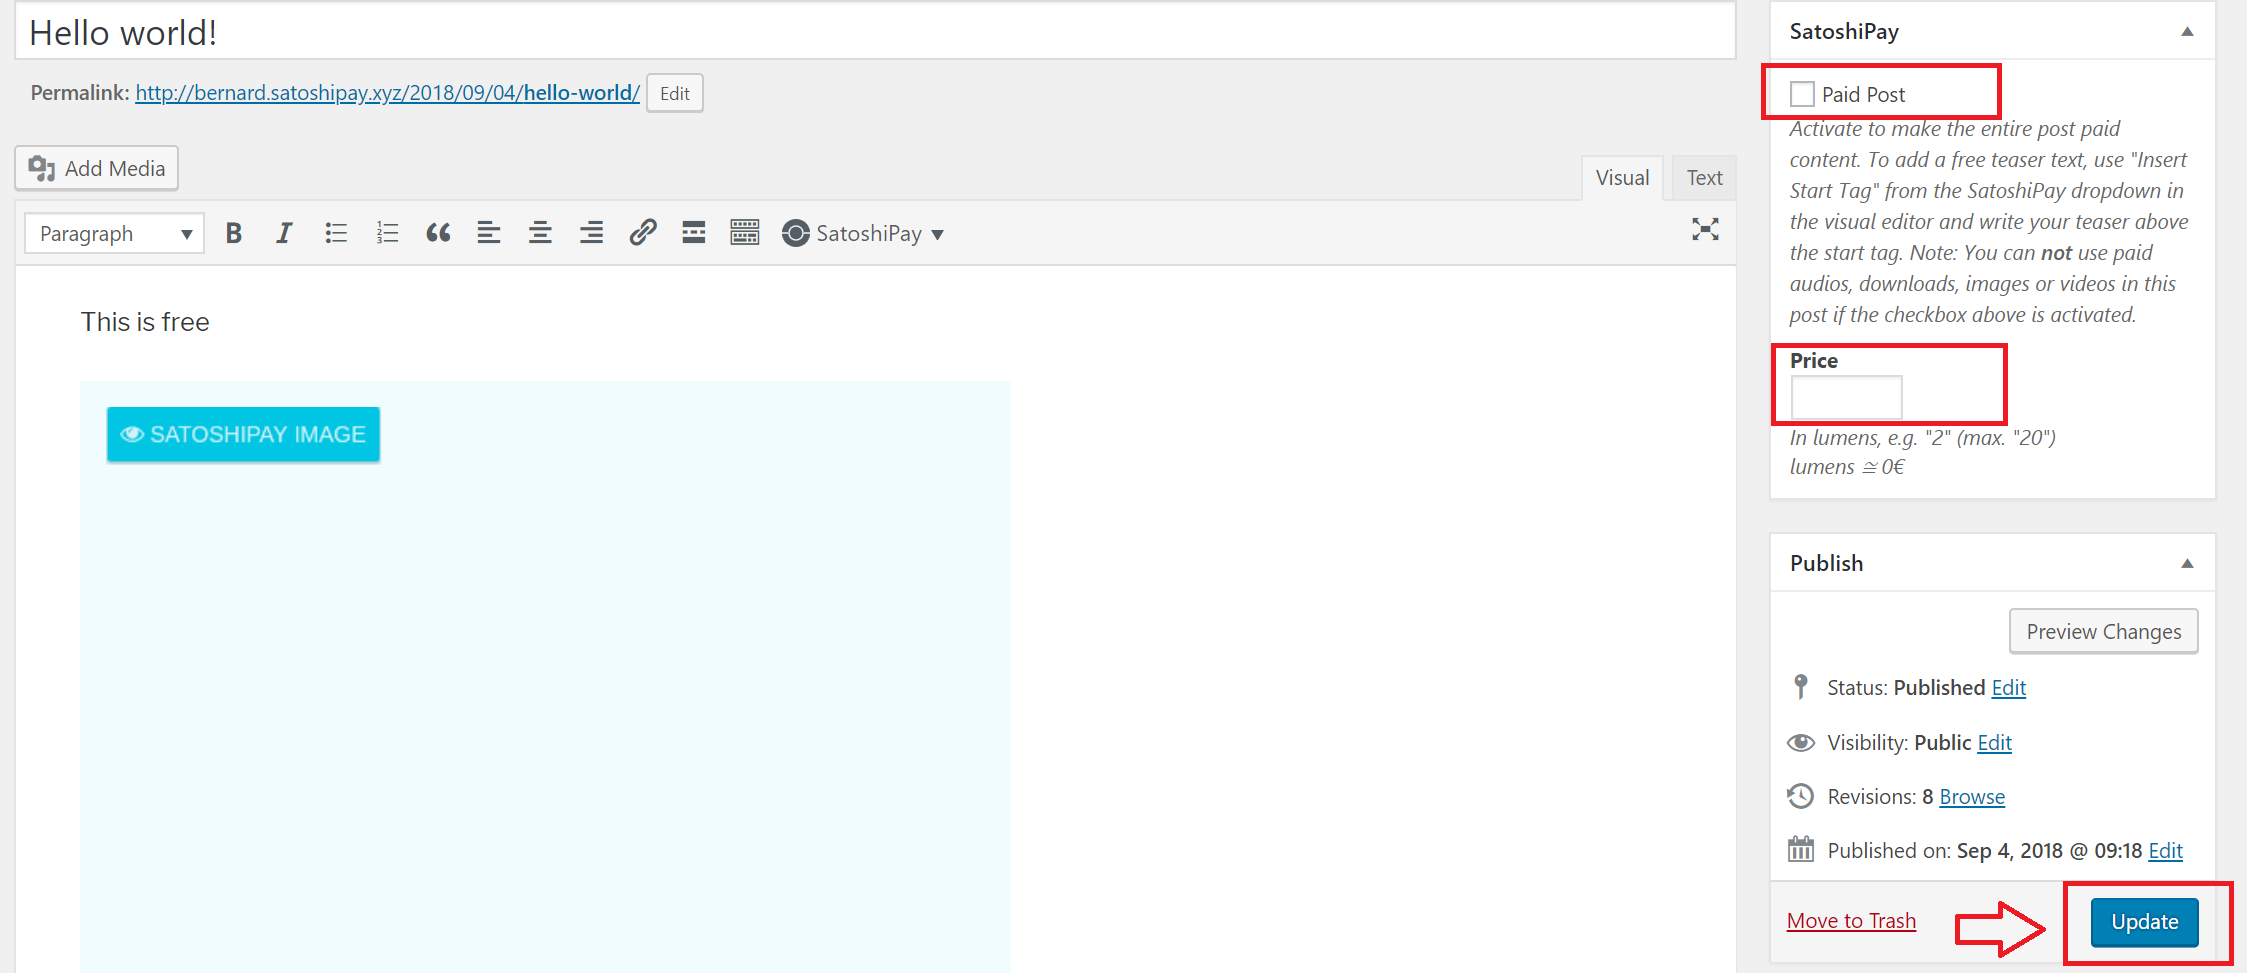
Your customers will now only see a preview picture with a price tag on the top left corner of the preview picture before they pay. Once they pay by clicking the "PAY" button, the original picture will then be revealed.
The process is almost the same when you create a new post instead of editing an old post. Simply follow the same procedure described above. However, instead of clicking the "Update" button in the end, simply click the "Publish" button at the same location to confirm it.

Comments
0 comments
Article is closed for comments.